Teeth Whitening in Ankara Turkey


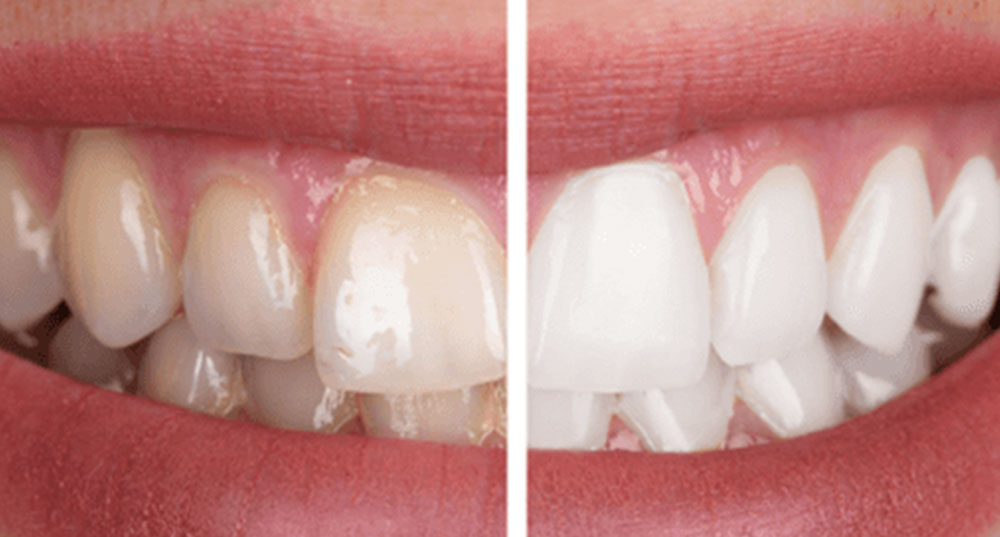
Teeth whitening is an aesthetic procedure available for patients primarily concerned with the color of their teeth.

Before any whitening procedure, it’s absolutely crucial to perform a thorough dental cleaning or at least a polishing. This step removes the invisible, film-like plaque layer that builds up on tooth surfaces. If this film isn’t removed, the whitening solution we use will remain on top of it, and the whitening won’t achieve the desired results.

Think of it like painting a wall – you wouldn’t paint over dirt, would you? Just as a clean wall allows for an even, vibrant coat of paint, a clean tooth surface ensures the whitening gel can directly access the enamel and effectively break down stains, giving you a brighter, more uniform smile. This preparatory step ensures maximum effectiveness and a truly radiant outcome from your whitening treatment.


Dentists categorize white shades differently than the average person, using a system of letters and numbers. For us, there isn’t just one “white”; there are numerous tones. We classify shades of white based on their saturation, transparency, and the amount of blue and yellow they contain. This classification is expressed with symbols like A1, A2, B1, and so on.

This system allows us to classify the patient’s existing tooth color before starting any procedure, helping us choose the most suitable shade within this classification. After noting the patient’s initial tooth color, we also take a photograph. However, there’s a crucial point to remember when taking this photo: the ambient lighting can significantly influence how the tooth color appears on camera. It might look excessively white or overly yellow. Therefore, it’s essential to carefully evaluate the physical conditions when capturing the “whiteness” photo. Whenever possible, the same environment should be used for photos taken at both the beginning and end of the whitening process. If these conditions aren’t met, the final photo might even appear more yellow than the initial one, despite successful whitening.

After any tartar and plaque are removed from the patient’s tooth surfaces, and if there’s no gum bleeding, the whitening treatment can begin. If bleeding is present, it’s stopped first.

Once the gums are isolated, the teeth whitening solution is applied to the tooth surfaces, and a blue laser light whitening device is positioned outside the mouth. Typically, the whitening process is done in two cycles on the same day, lasting approximately 1 hour and 15 minutes in total.

After the cycles are complete, the whitening solution is removed with a suction device to prevent the patient from swallowing it, and the isolation materials are taken out of the mouth. After the patient rests for a while, we move on to the final photography stage. If desired, these photos can be placed side-by-side (before and after) to visually compare the whitening results.

At our clinic, we also recommend brushing with a special single-use rechargeable toothbrush to help close the dentinal tubules that open during the whitening process. This not only helps maintain the whiteness for a longer period but also provides an opportunity for patients interested in trying a rechargeable toothbrush to experience it firsthand.